3d-cad-modeling
3D CAD Modeling
Reusable tools and agent instructions for creating, inspecting and modifying 3D models from descriptions, dimensions, drawings, photographs and existing geometry.
This project keeps a local log and scripts made during a build, and they are reused afterwards (meaning it’ll keep improving for you). You can keep those for yourself OR use the skills in the repo to open a Pull Request and improve the project for everybody.
This project now works with any CAD application that presents an MCP server, OpenSCAD, Blender and any STEP file. I have tested migrating STEP files, Python CadQuery scripts and a Blender model (one of the videos on the page).
Just be sure to be patient. Geometry calculations and checks do take time. The agent checks which modeling operations the MCP server provides and tests each adapted procedure on the new software.
Current scripts default to OpenCADStudio, but the skills do check the MCP server and the documentation to make the code needed for the adaptation and improve automatically.
This is ONGOING WORK. I’ll be updating it often. Please collaborate, copy it and share it. That is why the license is MIT.
TLDR Install
npx skills add leomrocha/3d-cad-modeling
Choose the skills and AI agent in the installer.
Then tell your agent to use those skills.
License
MIT for project code and documentation. All external sources and assets have their own licenses. If I have accidentally left some things without the real check, please contact me and I'll be really pleased to take them out.
Share the wins
Want to share a script or skill improvement from a modeling job? Contribute an improvement.
Introduction
If you want to go directly to the examples, check the Examples.
I've been working for some time on CAD modeling. The last time I really touched CAD was OpenSCAD (cause I've done software for 20+ years now). The last time I really did something manually in CAD was AutoCAD 2000, some 25+ years ago. I'm too lazy now to learn to use another CAD application, so I decided I'd make AI agents model things for me. I draw on paper as I learnt 3 decades ago, then take pictures and show them to the model. I have my computer running while I sometimes manage things from my phone.
This adventure has not been without problems, blockers, frequent cursing and, of course, AI SLOP that I try to keep to a minimum. After so much work, learning and process improvement, I've started to consolidate all things into a single skills and scripts repository that takes lessons from all those "adventures".
This repo is now a test bed for my recursive self-improving skill (RSI - yes, this is an exaggeration) that I'm using for yet another project to make it better. This skill set is far from done, though I already use it and I'll keep improving it (it is already improving with each new model, and I have 100+ models queued for the automated workflow).
The idea is to share and see if somebody can use it, learn new things and make things faster and simpler.
I'll also share the things that I've been working on in other repositories when I consider they are ready enough, although here you'll get some example screenshots from those projects.
Project
The project develops a common workflow for mechanical parts, assemblies, buildings and model handoffs to physics simulation.
The main pipeline for a 3D recreation from known things is:
- Give the agent the part name, drawings, pictures and known measurements.
- The agent checks whether a matching 3D model already exists.
- It reads the dimensions and identifies the separate pieces, holes and mounting points.
- It builds the missing shapes in CAD, or updates the existing model.
- It measures the result, compares it with the references, saves it and opens it again to check the saved file.
- It records the result and improves the reusable instructions or code for the next part.
And the main pipeline that I use for NEW things is:
- I create some hand sketches and descriptions.
- Send those to an agent.
- Make the agent spawn a swarm of lightweight research agents to look online for similar things, ideas, concepts and so on.
- Review those results.
- Select a few things and ideas, drop others, rephrase, rewrite, restate and review the definitions, references and so on.
- Get pissed off cause AI changed something without permission and without instruction.
- Write down all findings and ideas, then commit the changes to Git to keep them.
- Make AI use the skills for 3D modeling till it blocks (it cannot create things from nothing).
- Review things and get pissed off again.
- Iterate.
When I see things are ready enough, I send the automated 3D modeling pipeline to work.
Repository
docs/— linked documentation, selected example copies and images.skills/— agent task instructions.scripts/andtests/— reusable helpers and their checks.
Examples
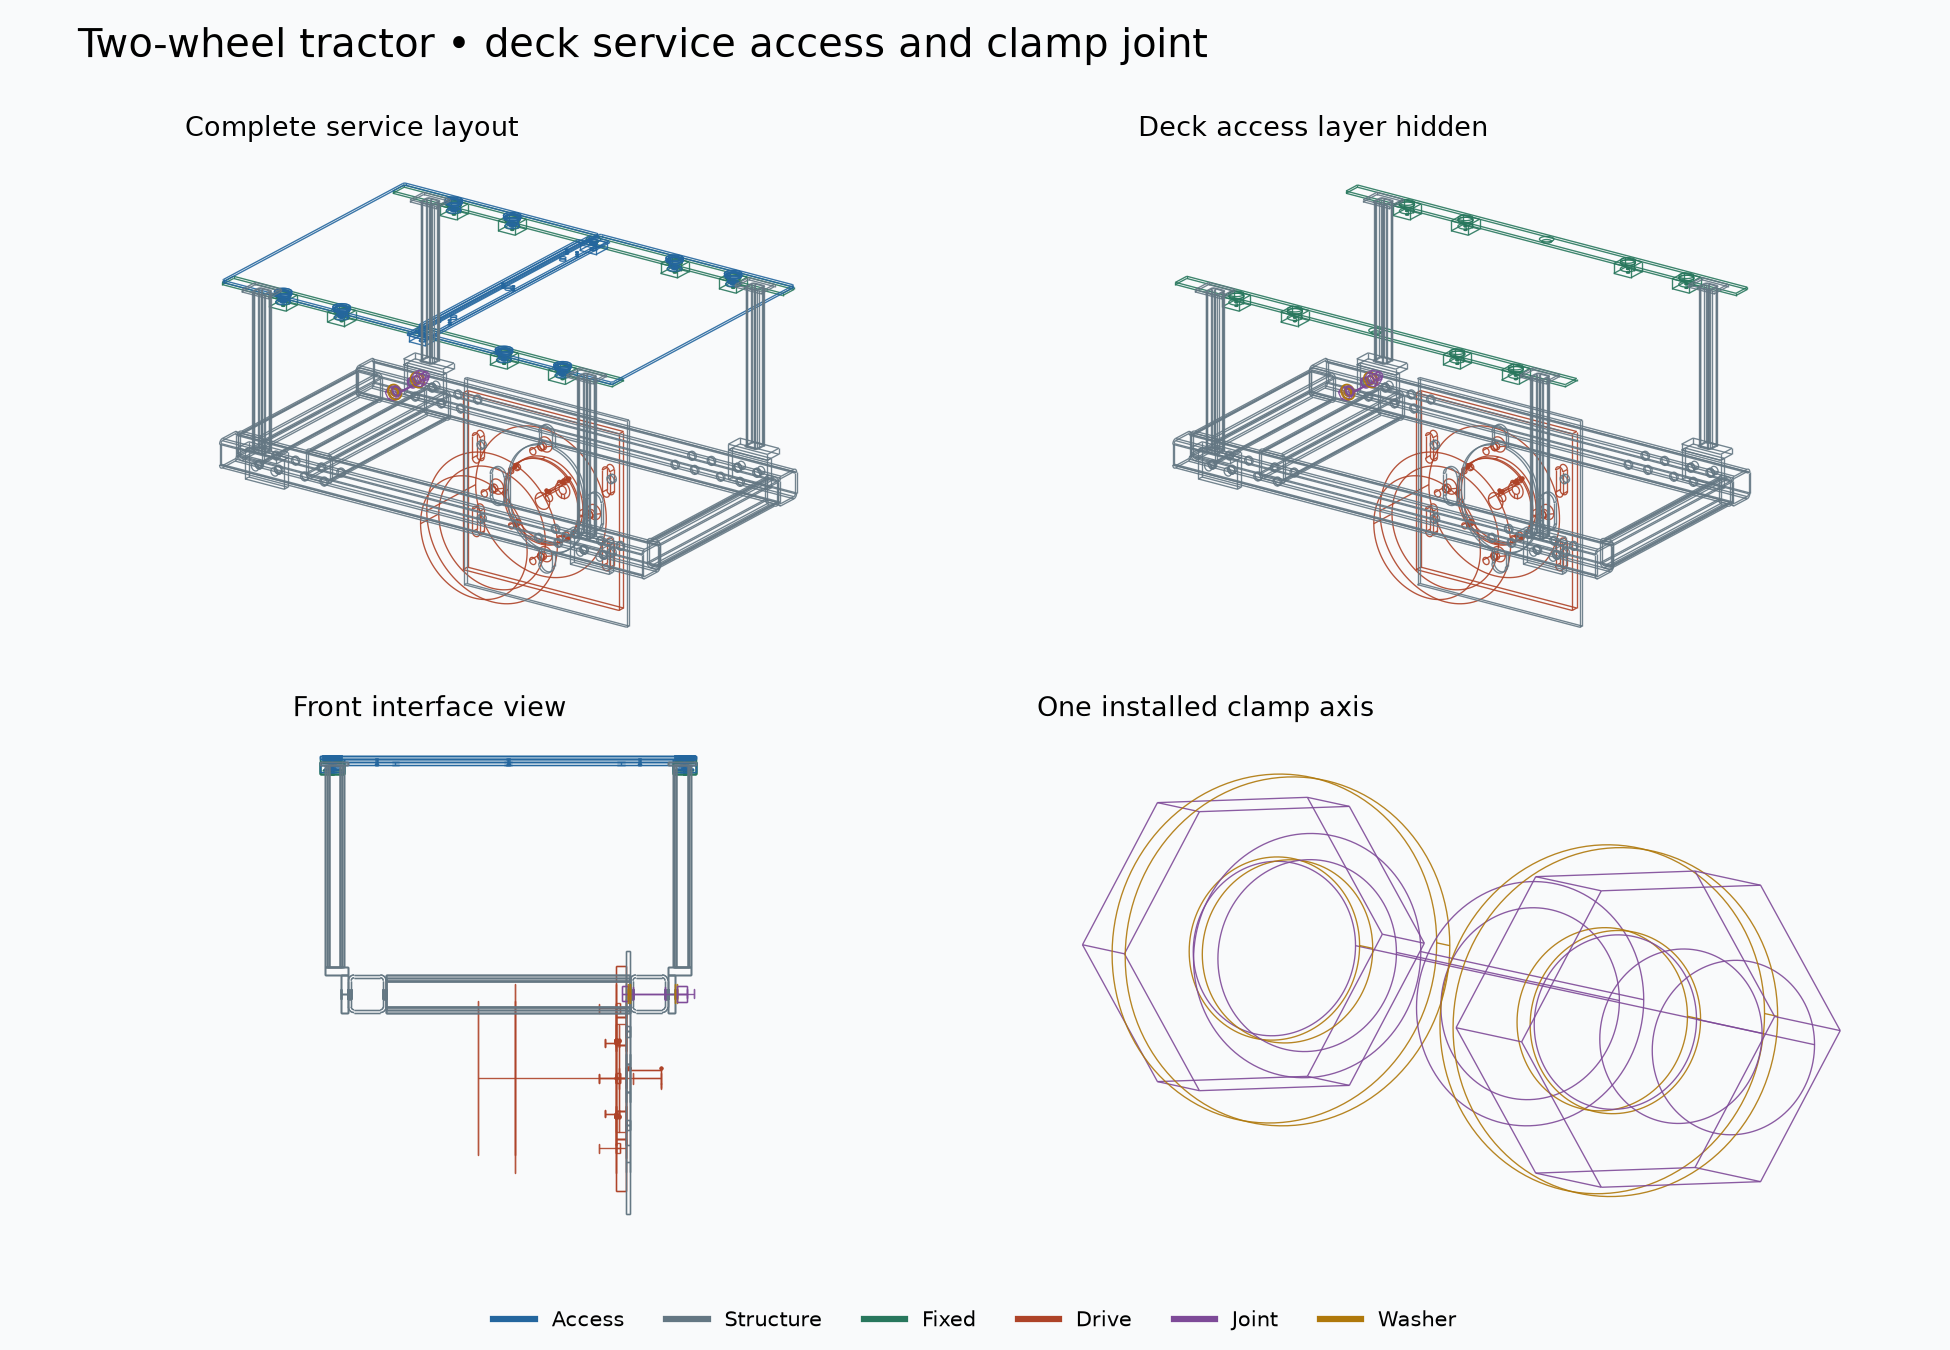
Tractor service-access assembly
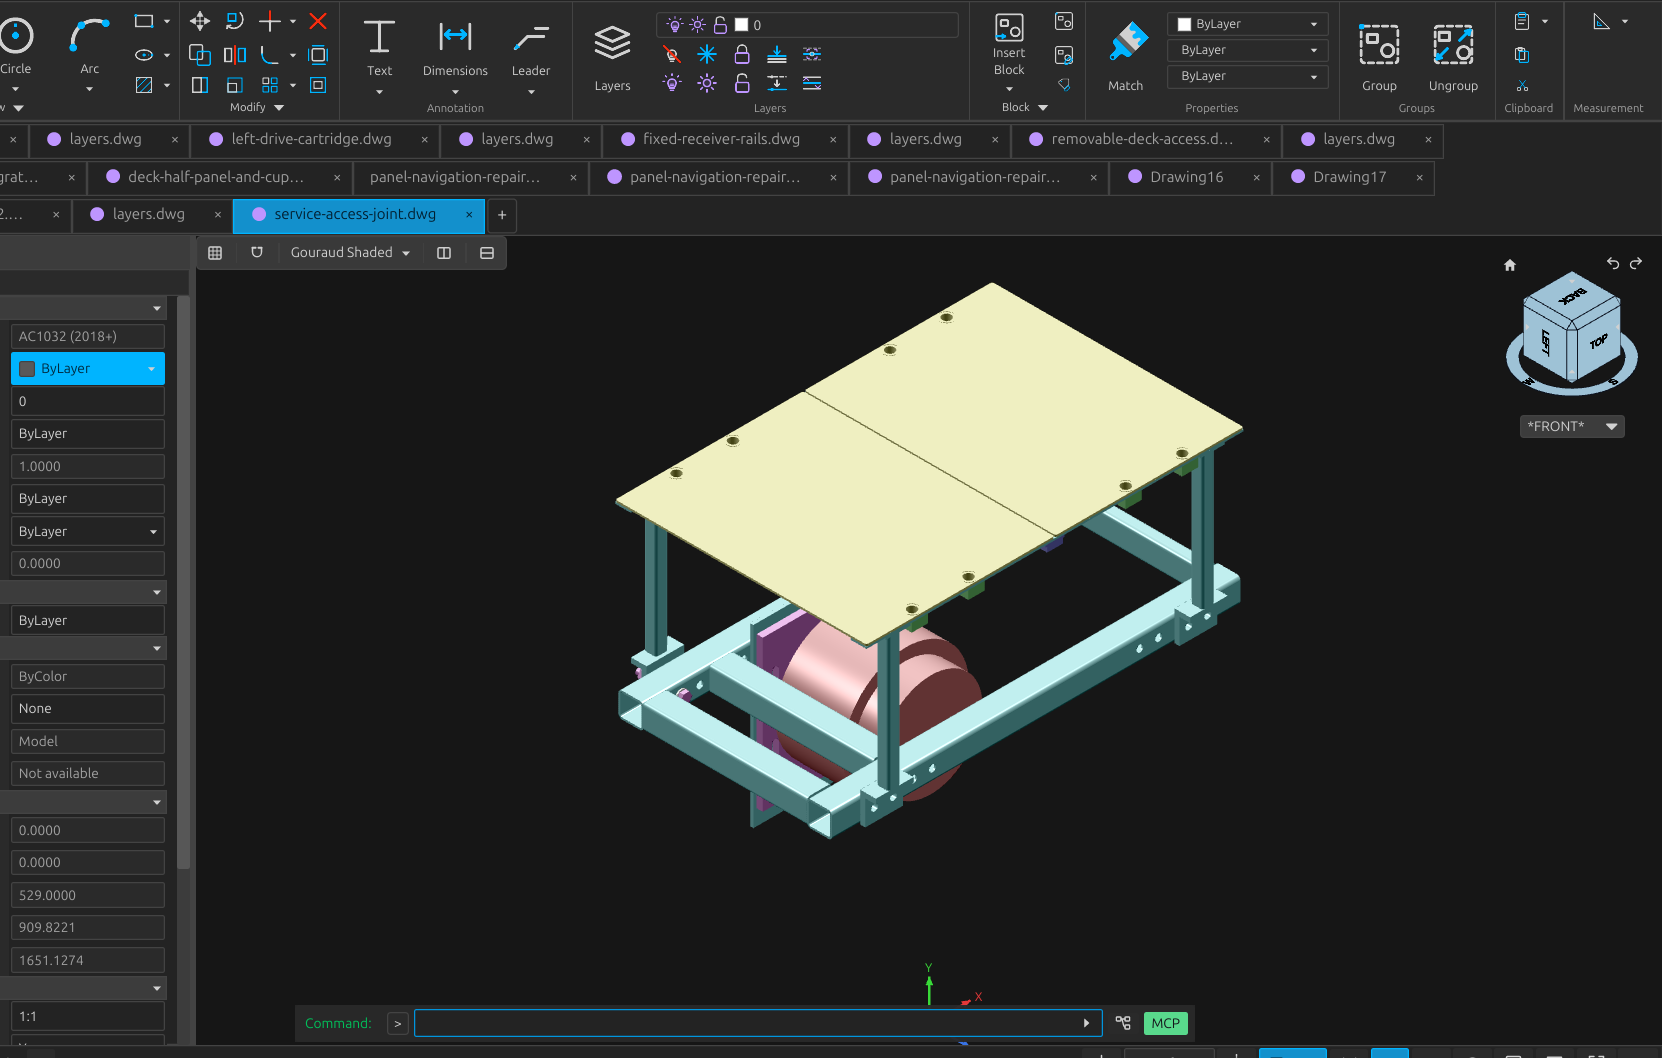
The blue deck in the drawing below is the removable group. Hide it and the fixed receiver rails remain visible above the motor. The lower views show the front interface and one clamp joint.
Real-time OpenCADStudio builds
Assemble the two-wheel tractor service deck
Watch the frame, receiver rails, motor cartridge and clamp hardware come together in an empty millimetre drawing. The removable deck goes on last. The live terminal follows the commands through layer isolation, reopening the DWG and selecting the outboard washer.
Play the complete take (1:43) · 0:04 Frame · 0:24 M10 screw and first washer · 0:57 Deck layer off · 1:03 Receiver isolation · 1:28 Fresh reopen and eleven-placement check
Build a glass-roof veranda against the house
The existing house fixes the position of the veranda. With the ground floor at 0 mm and the terrace at −100 mm, OpenCADStudio builds the post shoes, oak frame, 17 rafters and roof covering. Watch the joint cuts, the glazing and timber layers, and the rafter selection after reopening.
Play the complete take (2:04) · 0:05 Fabricate the post shoes · 0:29 Seat the transverse members · 1:08 Build seventeen rafters · 1:39 Isolate timber frame · 1:51 Close and reopen the native DWG
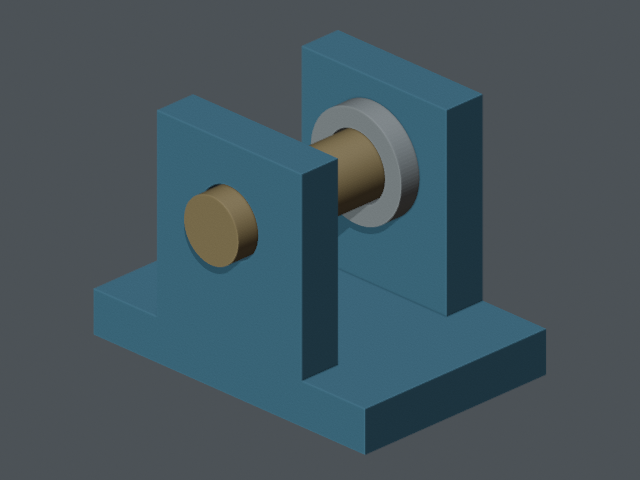
Clevis build and layer isolation
| Complete joint | Fork hidden to inspect the pin and spacers |
|---|---|
 |
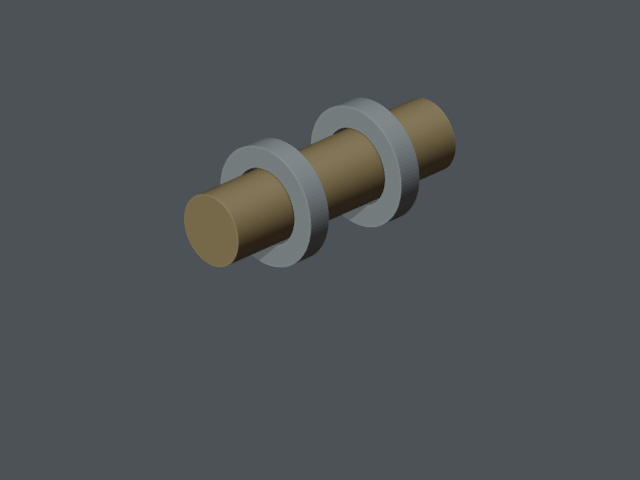 |
Watch the 16-second Blender build (MP4). Eight captioned stages show the plate, lugs, bore, pin and spacers, followed by the isolated hardware.
House modeling
The first thing I did at this complexity level with AI + drawings + pictures + a lot of iterations is a house model. You can see one example in the video reproducing part of the build. The first iteration was a model house with ad-hoc three.js visualization software. Now I’ve reproduced that model, migrating it from the previous model into OCS. The output was finally done in IFC and displayed in the browser.
Mast physics for a wind generator
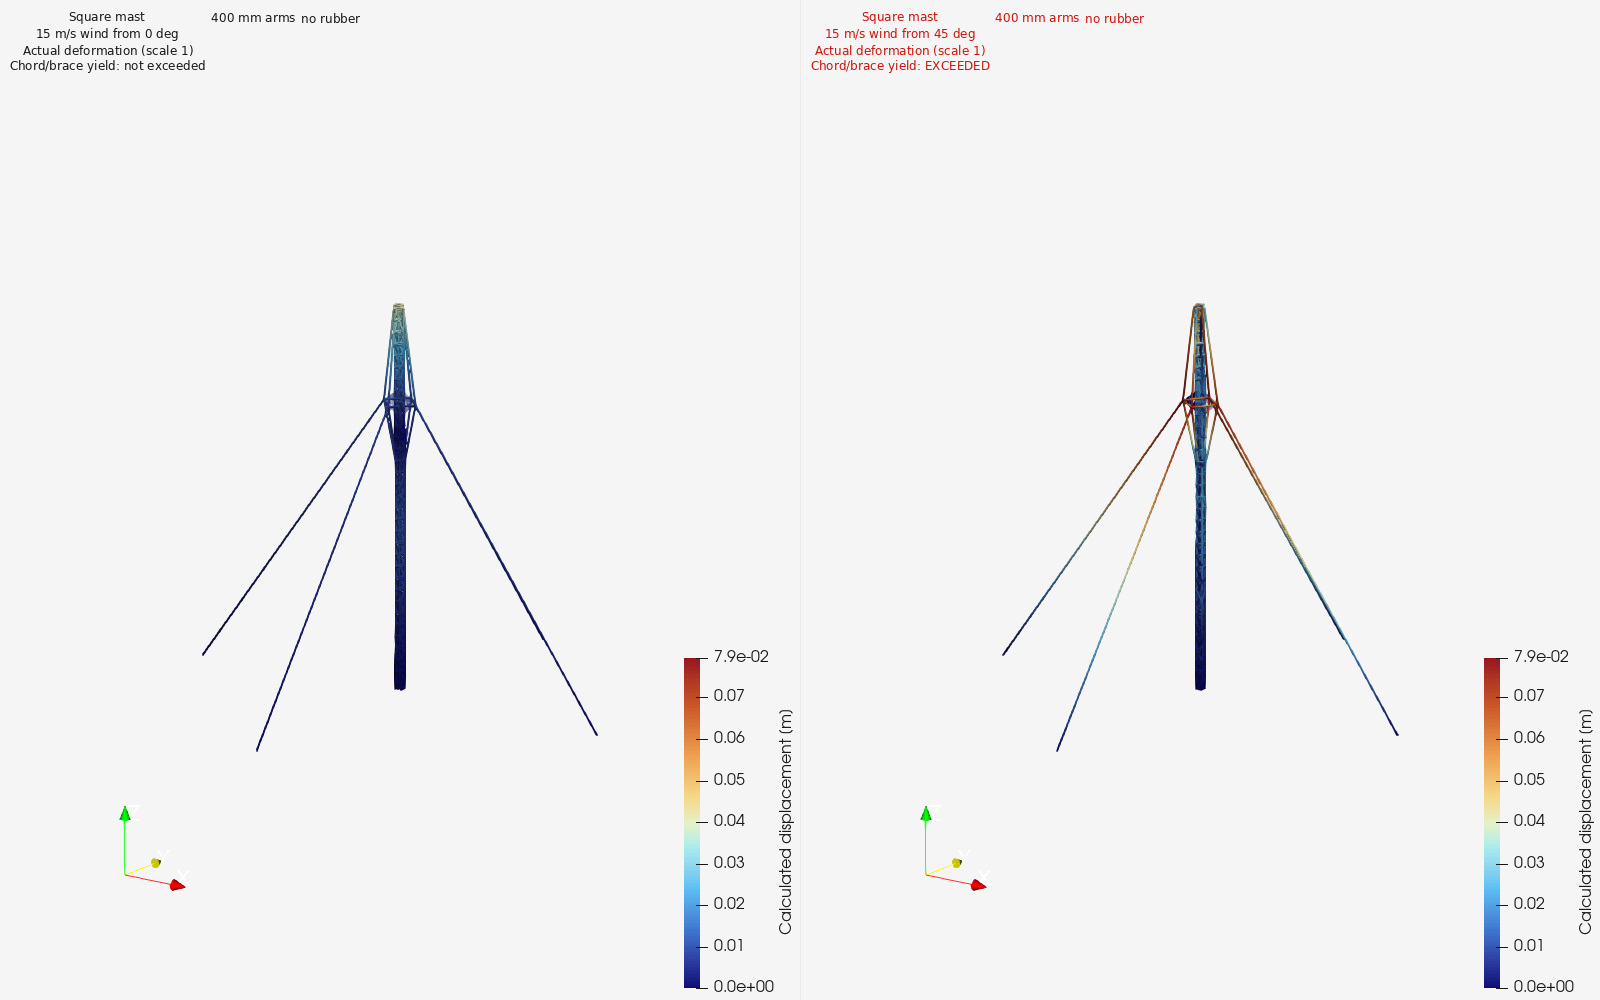
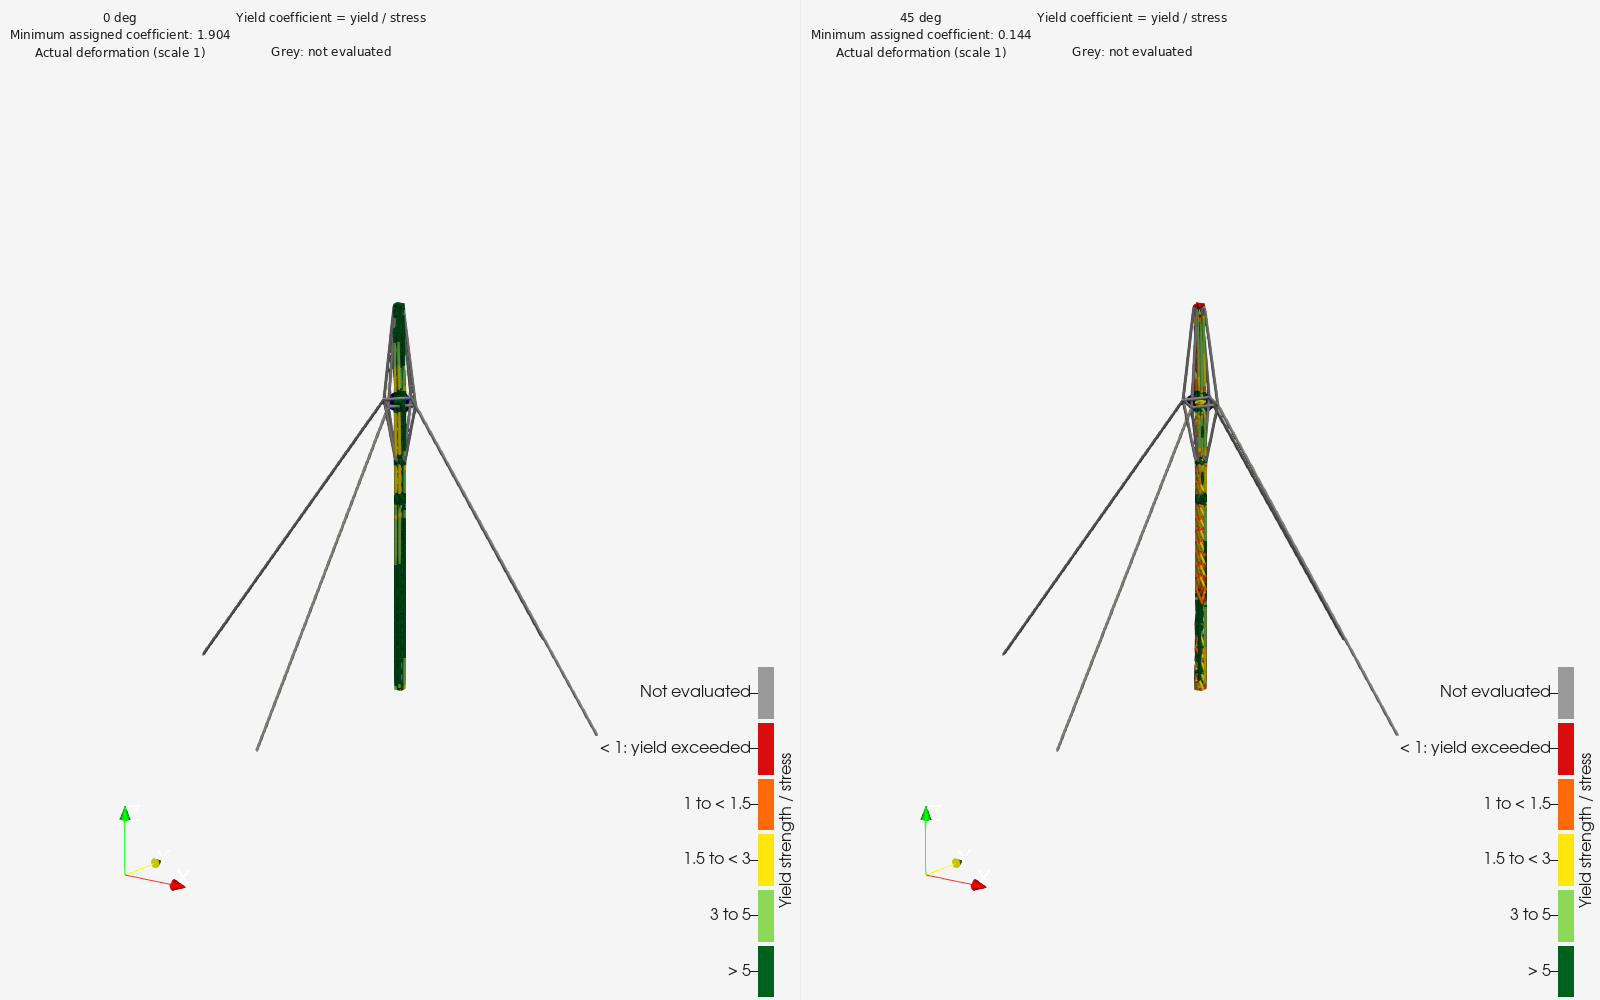
I’m working on a wind generator idea, so I started to check how to model a mast support and see how it would behave for the particular geometry I’m trying to get on the top part. Many of the things I did there for the 3D modeling worked out, so I add them here as examples of what the earlier work allowed me to do (with a lot of interaction and effort).
A square mast model and recorded Code_Aster wind cases. Mast model and simulation pictures.
Mechanical component models
Another current project is about making a remote-controlled 2-wheel tractor, but I do not really have time to work on it in detail, so I’m automating all that I can. This includes a (mostly) automated pipeline that gets available components from standards, pictures and manufacturer details that kind of fit in the base idea I have. I could write a lot, but the idea is to use this project as my 3D automation development test-base.
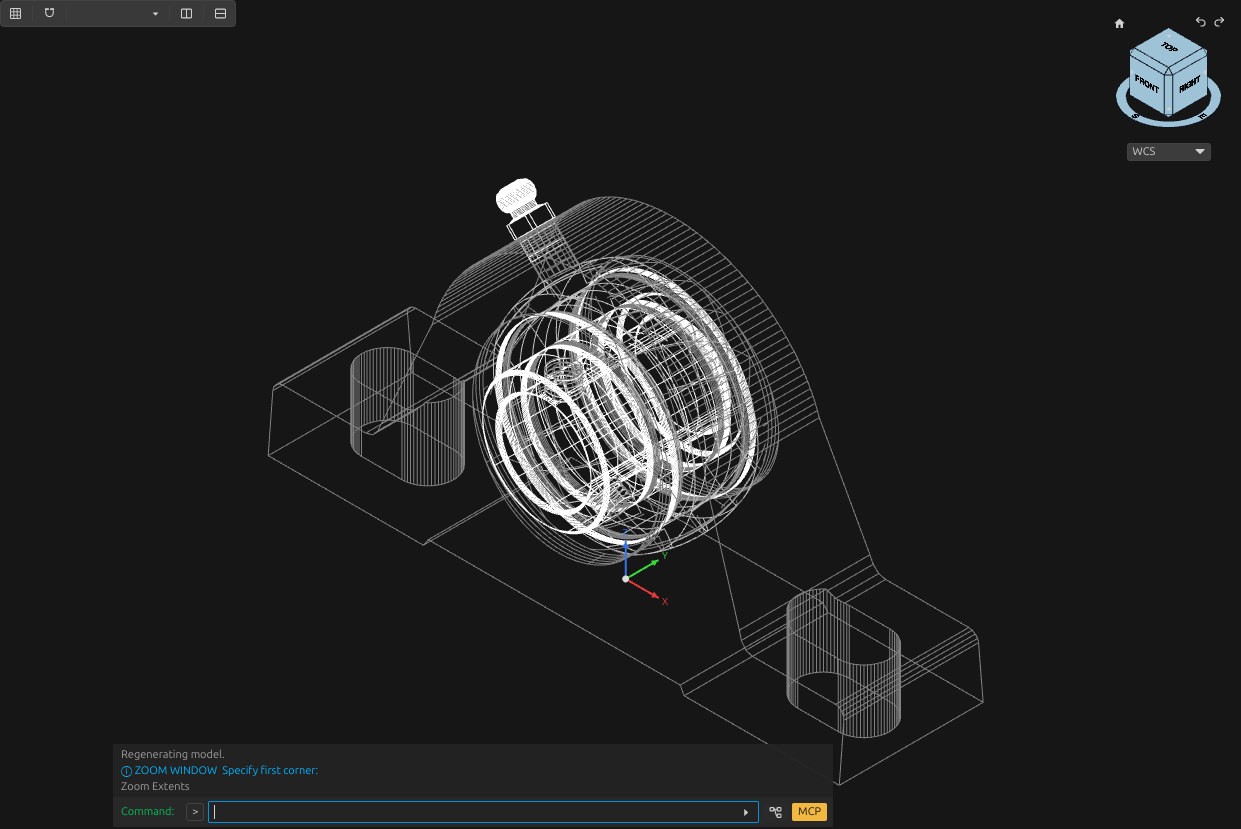
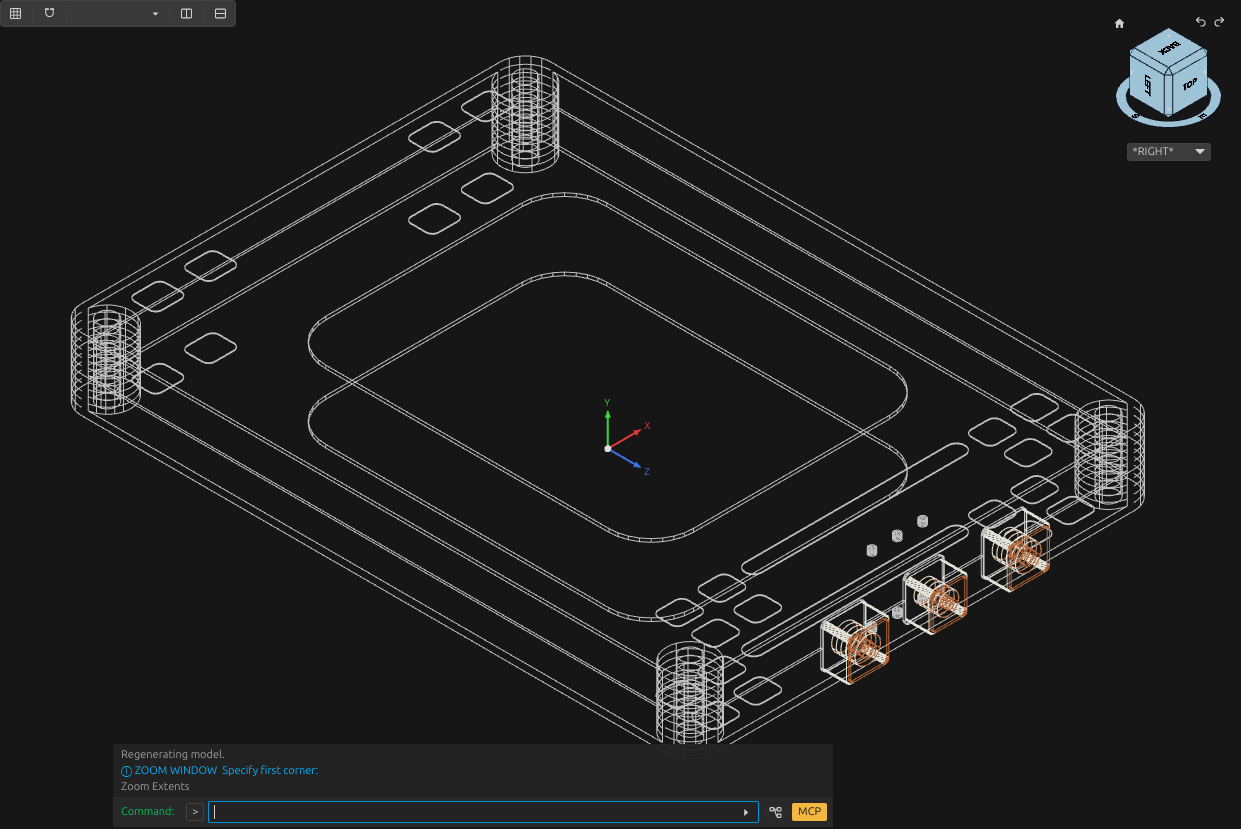
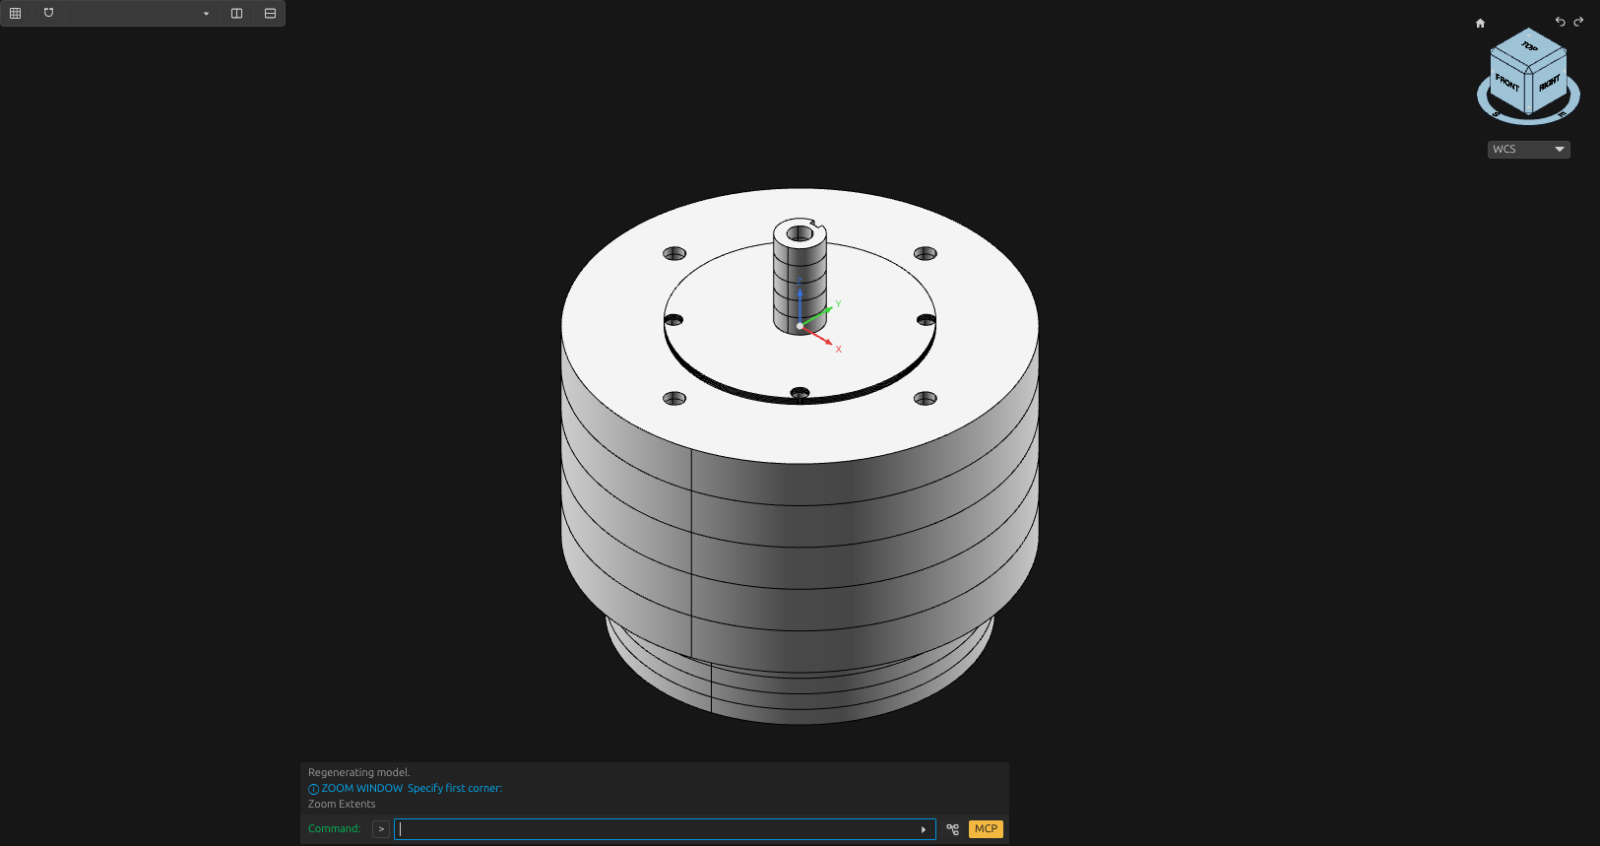
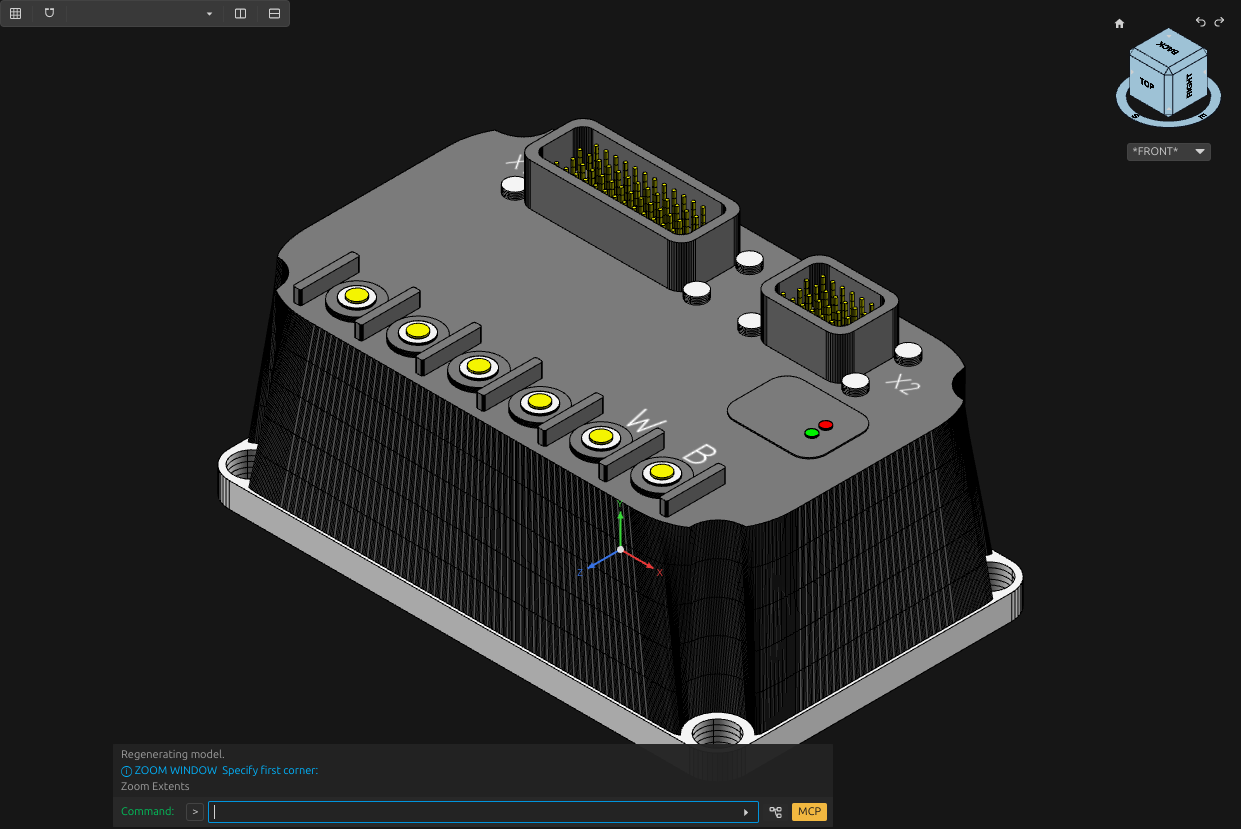
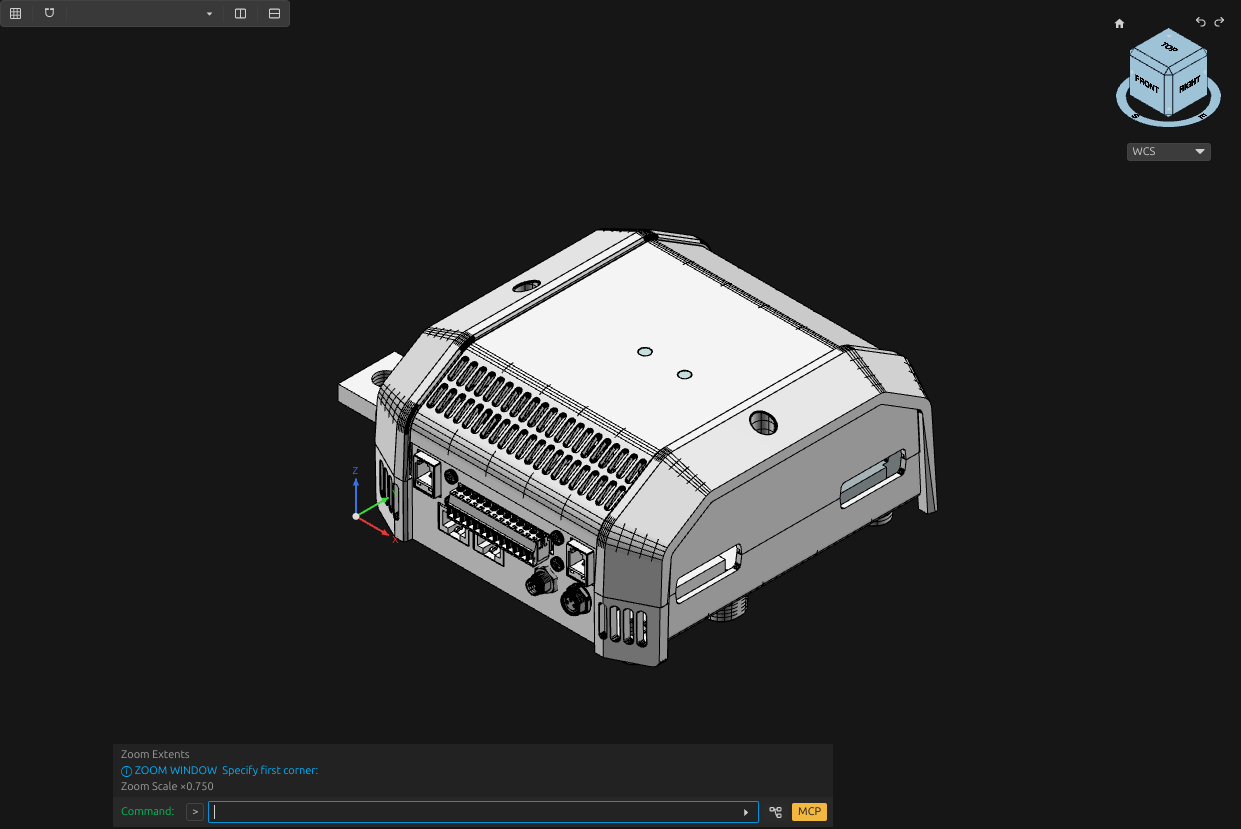
Selected motor, controller, bearing, battery and BMS examples show source-based construction, component boundaries and saved-model checks. Mechanical component examples.
Bearing unit
Battery module
Motor interfaces
Sumitomo motor controller
Reconstructed housing, power terminals, connector pins, mounting holes and labels.
Victron Lynx Smart BMS
Manufacturer CAD assembly with corrected component placements, showing ventilation slots, connectors, fasteners and separate housing parts.
Installing
Install with npx
Run this from the project where you want the skills available:
npx skills add leomrocha/3d-cad-modeling
Choose the skills and target AI agent in the installer.
Ask your AI agent
I would directly ASK the AI agent you are using to install this and make it available as skills and scripts.
For example:
Install the skills from leomrocha/3d-cad-modeling for this project, ask which installed tools and services to use, and check which operations they support. Use the installed skills for my modeling requests.
Use the skills with your agent
- Give the agent the drawing, pictures or dimensions and describe the model you need.
- Ask it to read cad-ocs-engineering for a component job, cad-drawing-inspection for a DXF, or cad-source-intake to record the inputs.
- Specify the component project’s input and output locations and the CAD session it should use.
- Review the resulting model and the changes recorded for that iteration.
Manual procedures
Prerequisites
- Node.js 22.20 or later, with npm and npx, for the skills CLI.
- Python 3.12 on Linux or macOS, with the existing dependencies for the selected operation.
- A running OpenCADStudio session for CAD operations.
Check the command versions:
node --version
npm --version
npx --version
python3.12 --version
Install an individual skill into a project
Current skill names: cad-ocs-engineering (OCS modeling and component workflows), cad-drawing-inspection (DXF inspection), cad-source-intake (source capture and revisions), cad-mcp-translator (adapt a procedure to another CAD endpoint), and cad-format-translator (convert a model or editable program).
This example installs for Claude Code. Run it from the project directory where you want the skill available. Choose cad-ocs-engineering, cad-drawing-inspection, cad-source-intake, cad-mcp-translator or cad-format-translator as SKILL_NAME.
SKILL_NAME=cad-ocs-engineering
npx skills add leomrocha/3d-cad-modeling --skill "$SKILL_NAME" --agent claude-code --copy --yes
SKILL_ROOT="$PWD/.claude/skills/$SKILL_NAME"
test -f "$SKILL_ROOT/SKILL.md"
The project installation is available in that project’s .claude/skills/ directory. --copy creates an independent package copy. For a shared symlink installation targeting Claude Code and Codex together, replace --agent claude-code --copy with --agent claude-code codex. Claude Code’s SKILL_ROOT path remains the same. The CLI uses copy mode for a single target agent. The CLI command reference lists other supported agents and their installation options.
Alternative: install for all projects
For a user-wide Claude Code installation, use --global and its user directory. CLAUDE_CONFIG_DIR, when set, supplies Claude Code’s configuration directory.
SKILL_NAME=cad-ocs-engineering
npx skills add leomrocha/3d-cad-modeling --skill "$SKILL_NAME" --agent claude-code --global --copy --yes
SKILL_ROOT="${CLAUDE_CONFIG_DIR:-$HOME/.claude}/skills/$SKILL_NAME"
test -f "$SKILL_ROOT/SKILL.md"
Alternative: install from a local checkout
Run this example from the 3D CAD Modeling checkout. It installs the current local skill for Claude Code in this checkout:
SKILL_NAME=cad-ocs-engineering
npx skills add . --skill "$SKILL_NAME" --agent claude-code --copy --yes
SKILL_ROOT="$PWD/.claude/skills/$SKILL_NAME"
test -f "$SKILL_ROOT/SKILL.md"
Set up and check the selected package
Keep SKILL_ROOT set to the installed directory. Use an existing Python environment.
- Ask the user which interpreters, tools, local models, parts sources and configured servers the agent may use. Check the operations during setup or on first use.
- Show the saved availability catalogue with
python "$SKILL_ROOT/scripts/operation_catalogue.py" show. Follow the skill’s setup procedure to check the approved resources. If an optional tool is missing, choose another method that produces the requested output. - After changing the available software, ask the agent to refresh the available skills. The refresh checks resources without installing software.
- OpenCV installation is a separate action. When the user invokes the OpenCV installer, it announces the installation and installs OpenCV in that run.
Give the agent your source files, job location and output paths. The cad-ocs-engineering package includes the OCS engineering workflow, component procedures, OCS control transport, geometry adapter and save/reopen helpers.
For cad-ocs-engineering, check a running OCS connection by replacing SESSION with its existing session ID:
python "$SKILL_ROOT/scripts/package_check.py" --session SESSION
The connection check reads OCS state and reports the observed document ID and revision. Package contents and maintenance.
Run a helper directly
With SKILL_ROOT pointing to cad-drawing-inspection or cad-ocs-engineering, inspect a DXF file named drawing.dxf:
python "$SKILL_ROOT/scripts/dxf_inspect.py" drawing.dxf --output drawing-inventory.json
Command-line options for the installed cad-ocs-engineering package:
python "$SKILL_ROOT/scripts/part_index.py" --help
python "$SKILL_ROOT/scripts/model_inventory.py" --help
python "$SKILL_ROOT/scripts/source_intake.py" --help
Tools
To get a list of all skills and Python helpers, read the tools page. The skill catalogue links the component procedures for source interpretation, construction, assemblies and saved-result checks. The tools page also covers source-bound annular, hexagonal and toroidal geometry and spherical-seat profiles.
DISCLAIMER
AI use:
- Code and skills are all written with AI. I instruct, reinstruct and review things, then I tell it to modify and update things. But as this is for AI use, I do not correct the phrasing for humans in the parts that are only dedicated to AI.
- The README and main HUMAN-targeted documentation files were sketched by me and written by AI. Then I drop almost everything cause I do not like it and rewrite things, then I send AI agents to fix some small things and details.
- For the AI documentation, I let AI do the writing and try not to get too angry about that cause they are instructions for AI, so …